How to post a photo album on Flickr
We’ll show you how to post photos on the Flickr portal. Create your own online photo album and invite your friends so they can see them.
Share photos on Flickr
Thanks to the Internet, we can now share the images of our life, not only with the people who visit us in our home and to whom we show them the classic albums of printed photographs. With photography in digital format, we can share our memories with people regardless of distances.
There are several websites that allow you to post photos for free, the two most important are Flickr, from the Yahoo company, and Picassa, from Google. In this note we will see how to post photographs on the Flickr portal
How to post photos on Flickr
Create an account on Flickr. The first thing is to create a free email account on the Yahoo! . This email will be your Yahoo ID, which will be used to obtain your Flickr account.
Flickr is one of the most important services for sharing photos or images.
Once you have obtained the email address, and click on “login”. There you will be asked to place your email (from Yahoo!) and password; Once this is done, write the username.
Upload photos or videos to Flickr. Once the account is created, enter it and press the “upload photos and videos” button, located at the top right of the page. Then, go to the “Choose Photos” link, which will take you to a browser subpage where you can locate the place where you have saved your photos on your computer (we recommend that you previously organize them in folders by event, to make it more easy). Select the photos you want to upload one by one and press “open”. Repeat this process until you see all the ones you want in the list on the web page.
Then, choose the security level you want your photos to have (public, private or just with friends, among other options). Then, press the “upload photos and videos” button.
Once loaded, press “add description”; the page will take you to a form in which you can modify the title of the photograph and add a short description of it. If you want the photo to be able to be located through the search engines of the page, place in the “tag” text box keywords that identify the published image. Then, press save.
Many professional or amateur photographers use Flickr to share or show their photo albums.
How to invite my friends to Flickr
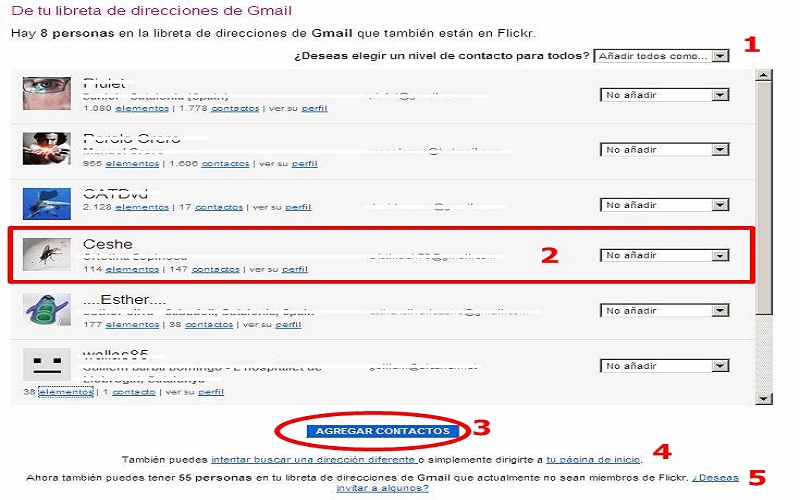
You have already published your photos on Flickr. There are two ways to invite your friends and family. The first is through the site: in the upper right you will find a link that says “contacts”. When you press there, you will see a list of sub-menus, among them select one that says “invite your friends”. This link will take you to forms where you can place the data of the people you want to invite. If you have private photos that you want to share, specify if they are family and friends. Once you’re done, press “Send.”
Another method is to send the people you want the link to your photo album on Flickr.
You can now enjoy sharing your experiences with all your friends … there are no excuses for not doing so.
How to create a Photo album on Facebook
If you have a profile on Facebook you can create your photo album to share on the internet. We explain how to do it.
Create a photo album on Facebook. Organize the photos before creating the album. Upload and share photos on Facebook.
Organize the photos before creating the album
One of the most fascinating things about the most extensive virtual social network in the world (Facebook) is the possibility of sharing the photos with your contacts, no matter in which corner of the planet they live.
To create a photo album on Facebook , the first thing you should do is sort and organize your photos on your computer (we suggest you name the folders as you want the albums you are going to create to be called). Once this process is finished (which may take a while) enter your profile, click on the part where it says “Photos” (to the right of your information) and then click on add photos. The possibility of sharing photos with your contacts is one of the most useful options for Facebook.
Create a photo album on Facebook
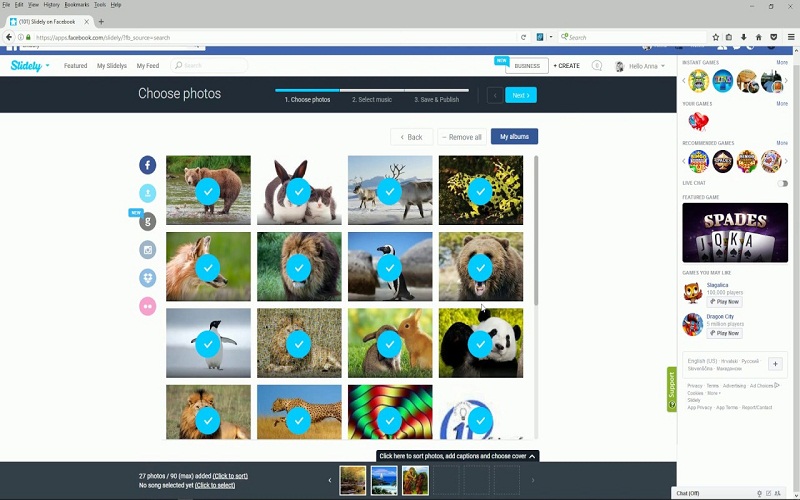
The next step will be to add the images, by clicking on “Select Photos”. The Windows Explorer will open to choose them. You can choose all of them, or by holding down the Ctrl key and clicking on each one.
Once loaded, each photo will give you a space to place a comment, as well as choose the level of privacy and where they were taken. If you do not want to do it individually, you can put this information to the entire album. Above, where it says “Album Title”, you can change it by clicking on the text, as well as the place where they were taken, while at the end you will find a button and a drop-down of the security level of the album. There you can decide who can see your content and who can not. The options are:
- Public: refers to all your contacts can see the photos.
- Friends: do not allow friends of your friends to see the photos.
- Only me: Only you can see them, making them completely private.
- Customize: By pressing this option, a sub-menu will be displayed in which you can choose options such as the previous ones and “people or specific lists”. To activate this last option, you must write in the text box the names of the people you want to see the photos, that way you can filter the access to the images of your profile. When finished, click on the “Save changes” link.
Upload and share photos on Facebook
You have already created the album. When finishing the selection press the button “Publish photos”, or if you want, you can add more with the link on the left.


Average Rating